|
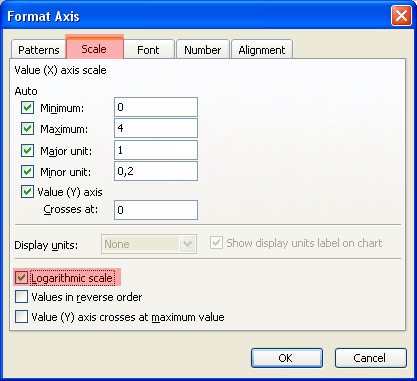
Advertisement Linux has long been synonymous with bootable flash drives, whether it’s to fix some sort of problem with your primary OS, or for trialling and installing USB drives are great, not just for installing portable versions of Linux but for protecting your computer when things go awry. Here are the 5 most useful Linux distributions for installing on a USB drive. There are a few ways to get a create live USB sticks that will boot on your Mac. You can go the freeware route for an easy option, or put a little bit of time into creating the drive yourself using Terminal. Today we’ll cover both these methods! First: Prepare Your USB Drive Make sure you choose the right USB drive for the job, and that it’s formatted correctly to avoid any problems. Some Linux variants may require larger volumes, so pay attention to the requirements when downloading. Others don’t have any strict requirements, but formatting to FAT beforehand is a good idea: Warning: Everything on your drive will be erased if you do this! Move Y axis to left/right/middle. Here is a section called Vertical axis crosses can help you to move Y axis to anywhere as you need. Double click at the X axis (horizontal axis) to display the Format Axis pane. See screenshot: If you are in Excel 2010 or 2007, it will open the Format Axis dialog. Left click on Horizontal axis; right click and select 'Format Axis.' In the options for 'Vertical axis crosses' select 'Axis value' and enter the horizontal axis value you want the vertical axis to be positioned at. Re: Move Axis to Bottom of Graph Excel 2008 for Mac should be similar to 2007 for Windows (which I'm not in front of right now). If you open the Format dialog, you should see something similar to the screenshot attached. Outlook for mac 2011 support. Configuring Gmail (IMAP) and Outlook for Mac 2011 Having recently started to use a Mac at home, quickly started to miss Outlook. So I was delighted to hear of the release of Microsoft Office for Mac 2011. Outlook for Mac can automatically set up accounts from many popular email service providers such as Outlook.com (previously known as Hotmail), AOL, Gmail, MobileMe, and Yahoo. If Outlook can't set up an account automatically, you can configure it manually. Open Outlook 2011 and click the Outlook > Preferences. Select the Accounts icon. If you have any accounts currently added to Outlook they will show here. Otherwise, it will show as empty. Click the icon next to E-mail Account. Enter your Gmail address and password, and leave the Configure automatically box checked. Click the Add Account button. Outlook will attempt to find the server information for you. Before opening Outlook, we should double check some settings in Gmail so that you can properly sync your messages to the desktop. Log into Gmail and click the settings button — look for the gear on the right. Add Your Gmail Account to Outlook 2011 Mac Using IMAP. To set up your Outlook client to work with Gmail: Enable IMAP in Gmail; Sign in to Gmail. Click the gear icon in the upper-right and select Gmail settings at the top of any Gmail page. Click Forwarding and POP/IMAP; Select Enable IMAP. Configure your IMAP client and click Save Changes. Open Microsoft Office Outlook 2011. You settle into the old routines of also establishing as examining software, eliminating them from your system also swiftly misunderstanding, so it’s the software package that has your pc, perhaps not the apparatus. Each of them relies on ab muscles element that is same the operating-system also as installed applications. There’s difference that is little a 1-year-old Computer in addition to a brand name quantity computer. All style of short-term information is kept strewn during your hard disk drive after creating and getting rid of pc software, then searching the internet for two months. Ccleaner for mac free download full version. Table of Contents • • Ccleaner 2018 Full Version free download with Registration Code [Windows + MAC ] Ccleaner 2018 Full Version free download with Registration Code [Windows + MAC ] Ccleaner 2018 Full Version Free Download Of Registration Code [Windows ]Outcome? • Insert your USB drive into your Mac and launch Disk Utility (under Applications > Utilities, or Today we're going to share our favourite good Mac habits, while desperately trying to forget the bad ones.). • Select your USB device in the menu on the left, then click Erase. • Give it a name (or not) and choose MS-DOS (FAT) under “Format” and GUID Partition Map under “Scheme.” • Hit Erase to apply the changes. If it fails, try again — sometimes the system doesn’t unmount the volume in time and the process will be unable to complete. Generally speaking anything above 4GB will do the job (I used an 8GB Lexar for this tutorial). This guide will show you to dual-boot OSX with Kali Linux using rEFInd, with the. It also has the advantage of helping older devices boot from USB that would. If you have persistent problems, try another USB drive. Method 1: Create a Live USB Using Etcher (Easy) is a free open source tool for burning disc images onto USB and SD drives. It’s a relatively recent addition to the When most people think open source, they think Linux. But Mac OS X has its share of quality open source programs as well — and a bunch of them aren't available for Linux or Windows., and it makes creating bootable devices completely foolproof: • Grab your desired Linux image, then and install it. • Insert your USB stick, then launch Etcher. • Click Select image and find the Linux image you downloaded — Etcher supports.IMG,.ISO and.ZIP among others. 
• Ensure the correct USB device is selected — hit Change to see a list of connected devices. • Finalize the process by clicking Flash! And wait for the process to complete. You’ll likely see an error message warning you that your USB drive isn’t compatible with your Mac. That’s normal — simply eject and go.
0 Comments
Leave a Reply. |
 RSS Feed
